Your first study in 15 minutes
Build a short survey, take it on your own phone and find your answer in the study's data. Everything runs on the Free plan, and the study stays a draft, so no participant receives anything.
1. Create your account
- Go to smaat.eu/signup and choose Continue with Google or Continue with ORCID. Accounts created with ORCID receive the academic discount automatically.
- If you sign up with email and password instead, save the recovery code when SMAAT shows it, then click the link in the confirmation email. The dashboard opens once the address is confirmed.
✓ CheckThe dashboard shows the New study button.
2. Create a draft study
- On the dashboard, click New study.
- Under Create from Scratch, enter a Study Title such as "Quickstart test" and click Create Draft Study.
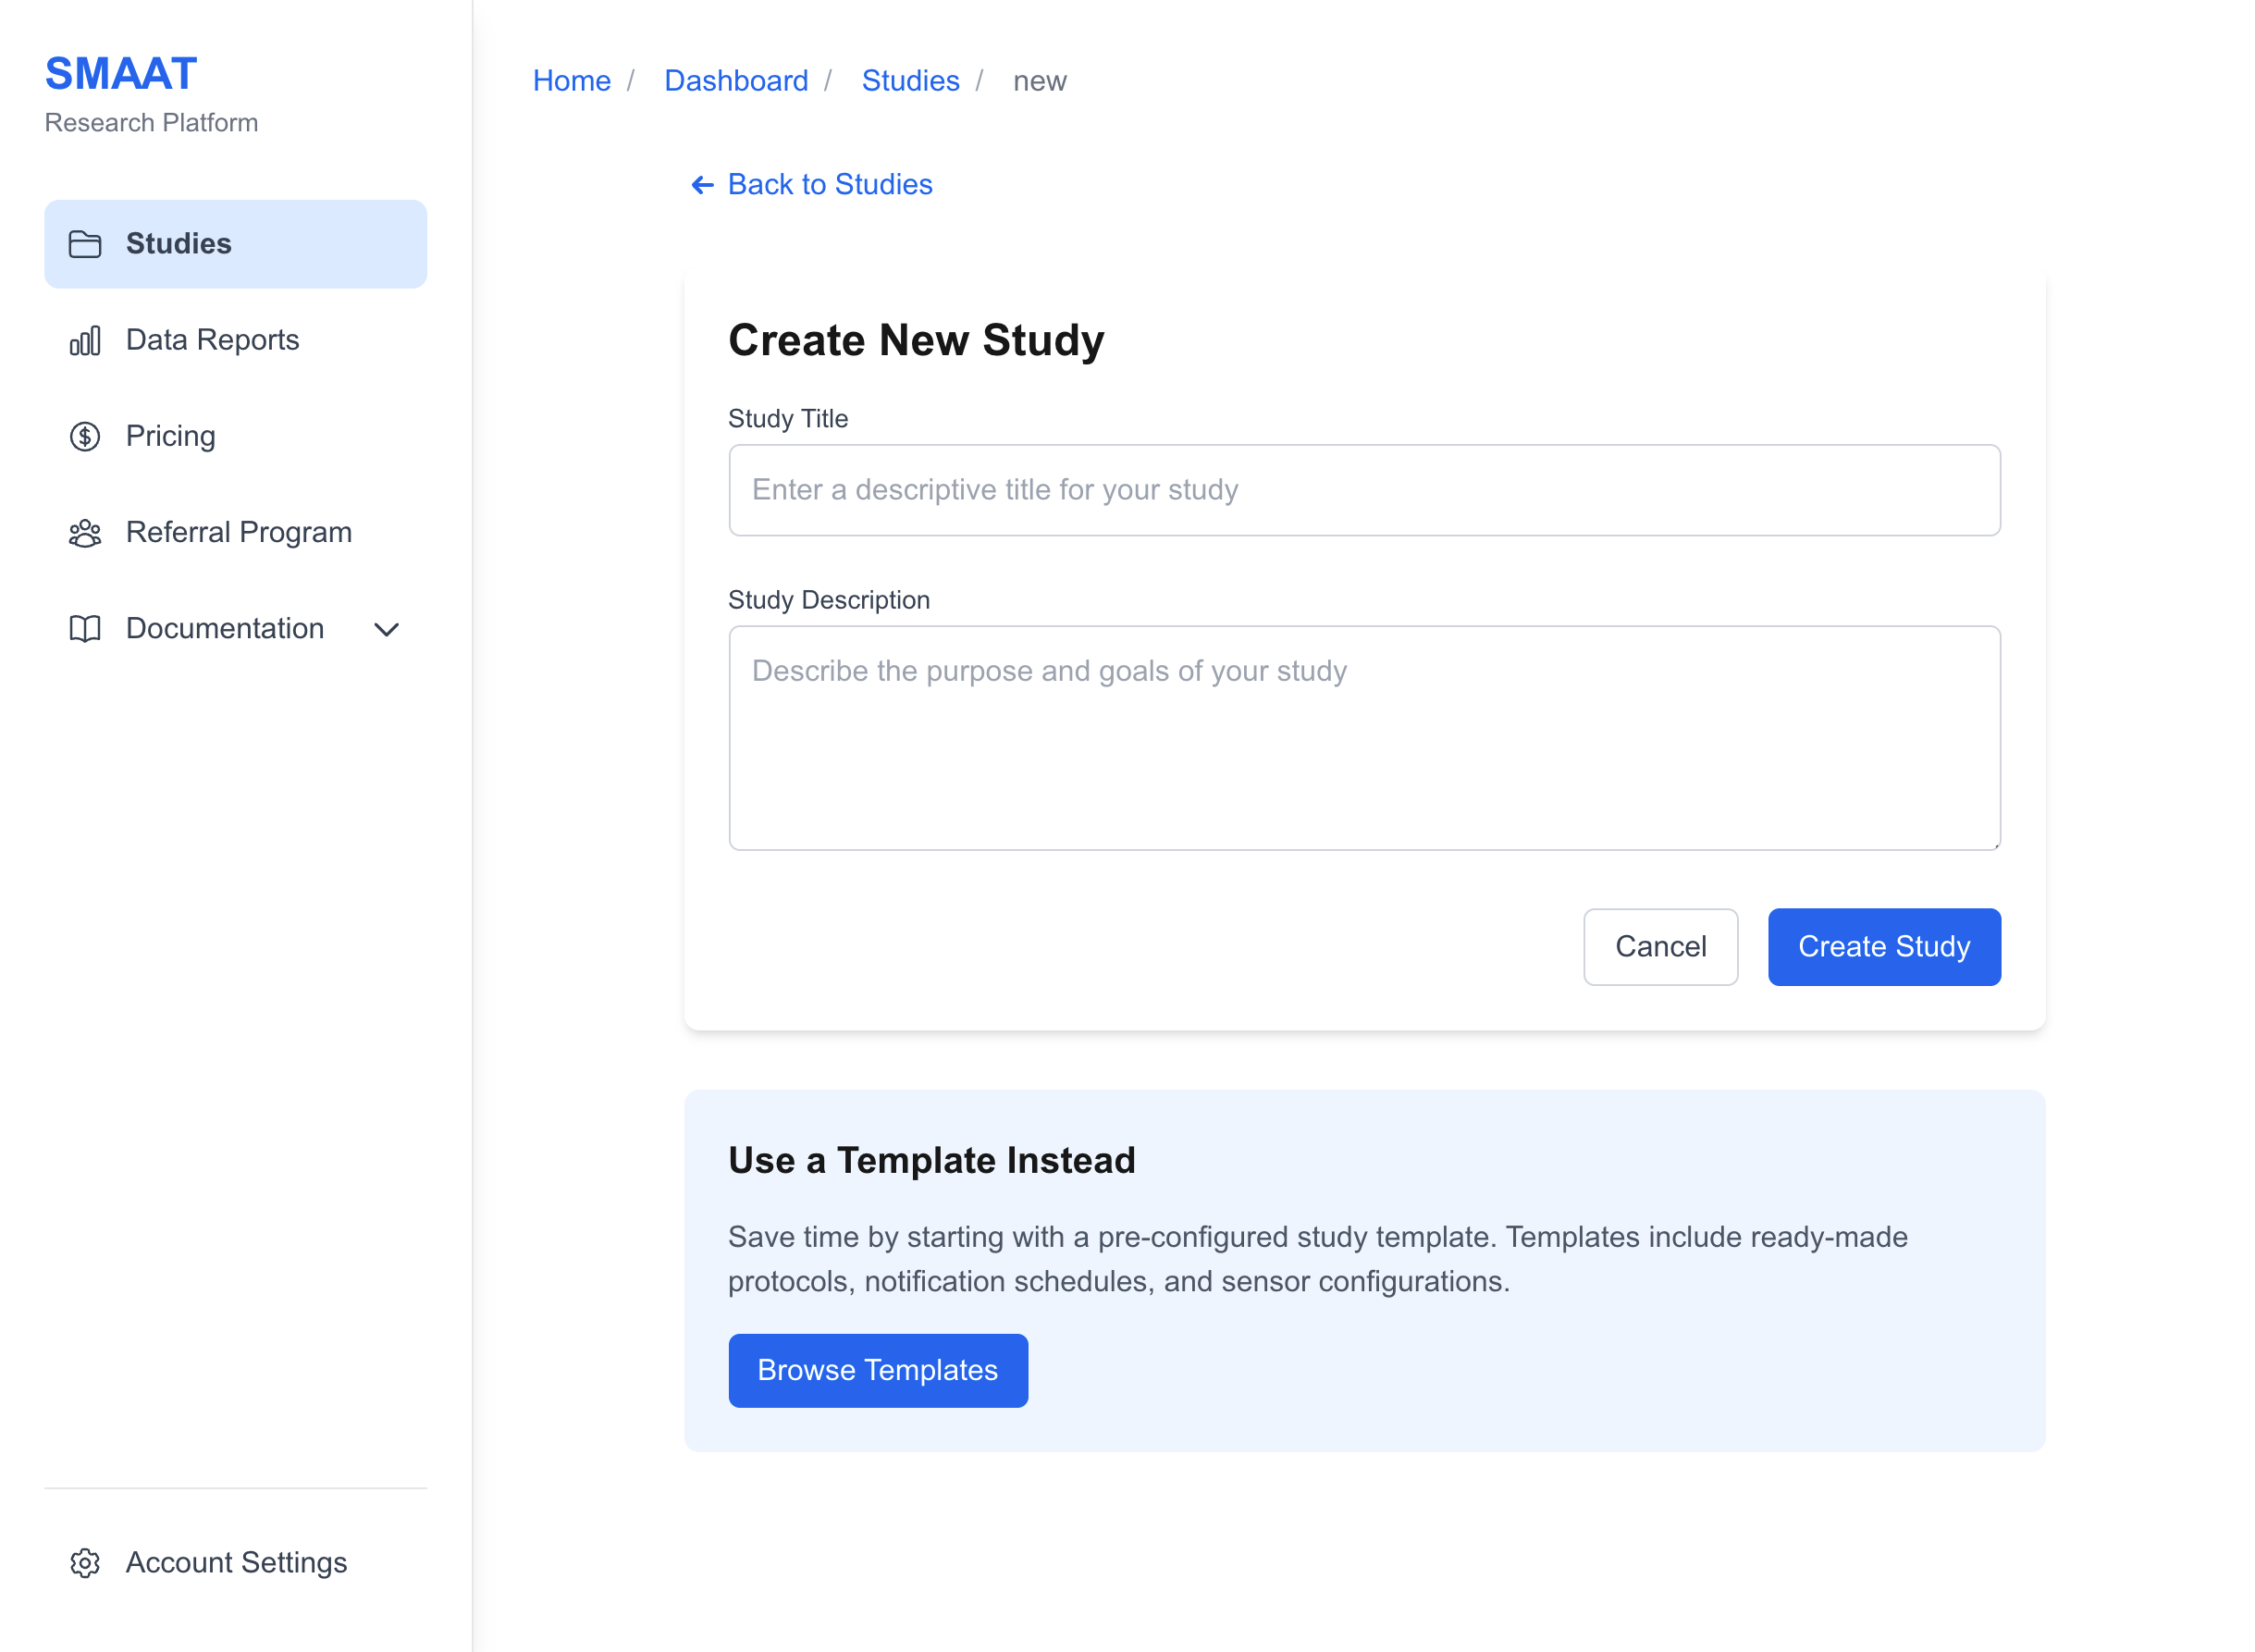
The Free plan allows one study. You can keep building on this one afterwards or delete it in Settings.
✓ CheckThe Study Builder opens on your new study.
3. Write a three-question survey
- Open the Protocol tab and click + Add Protocol. In the Study Builder, surveys are called protocols. Enter "Check-in" as the Internal Title.
- In the Builder tab, click three element types in the Elements panel, then click each new element and enter its Question Text:
- Likert Scale: "How is your mood right now?"
- Slider: "How stressed do you feel right now?"
- Text Input: "What are you doing at the moment?"
- Click Save at the top of the Study Builder.
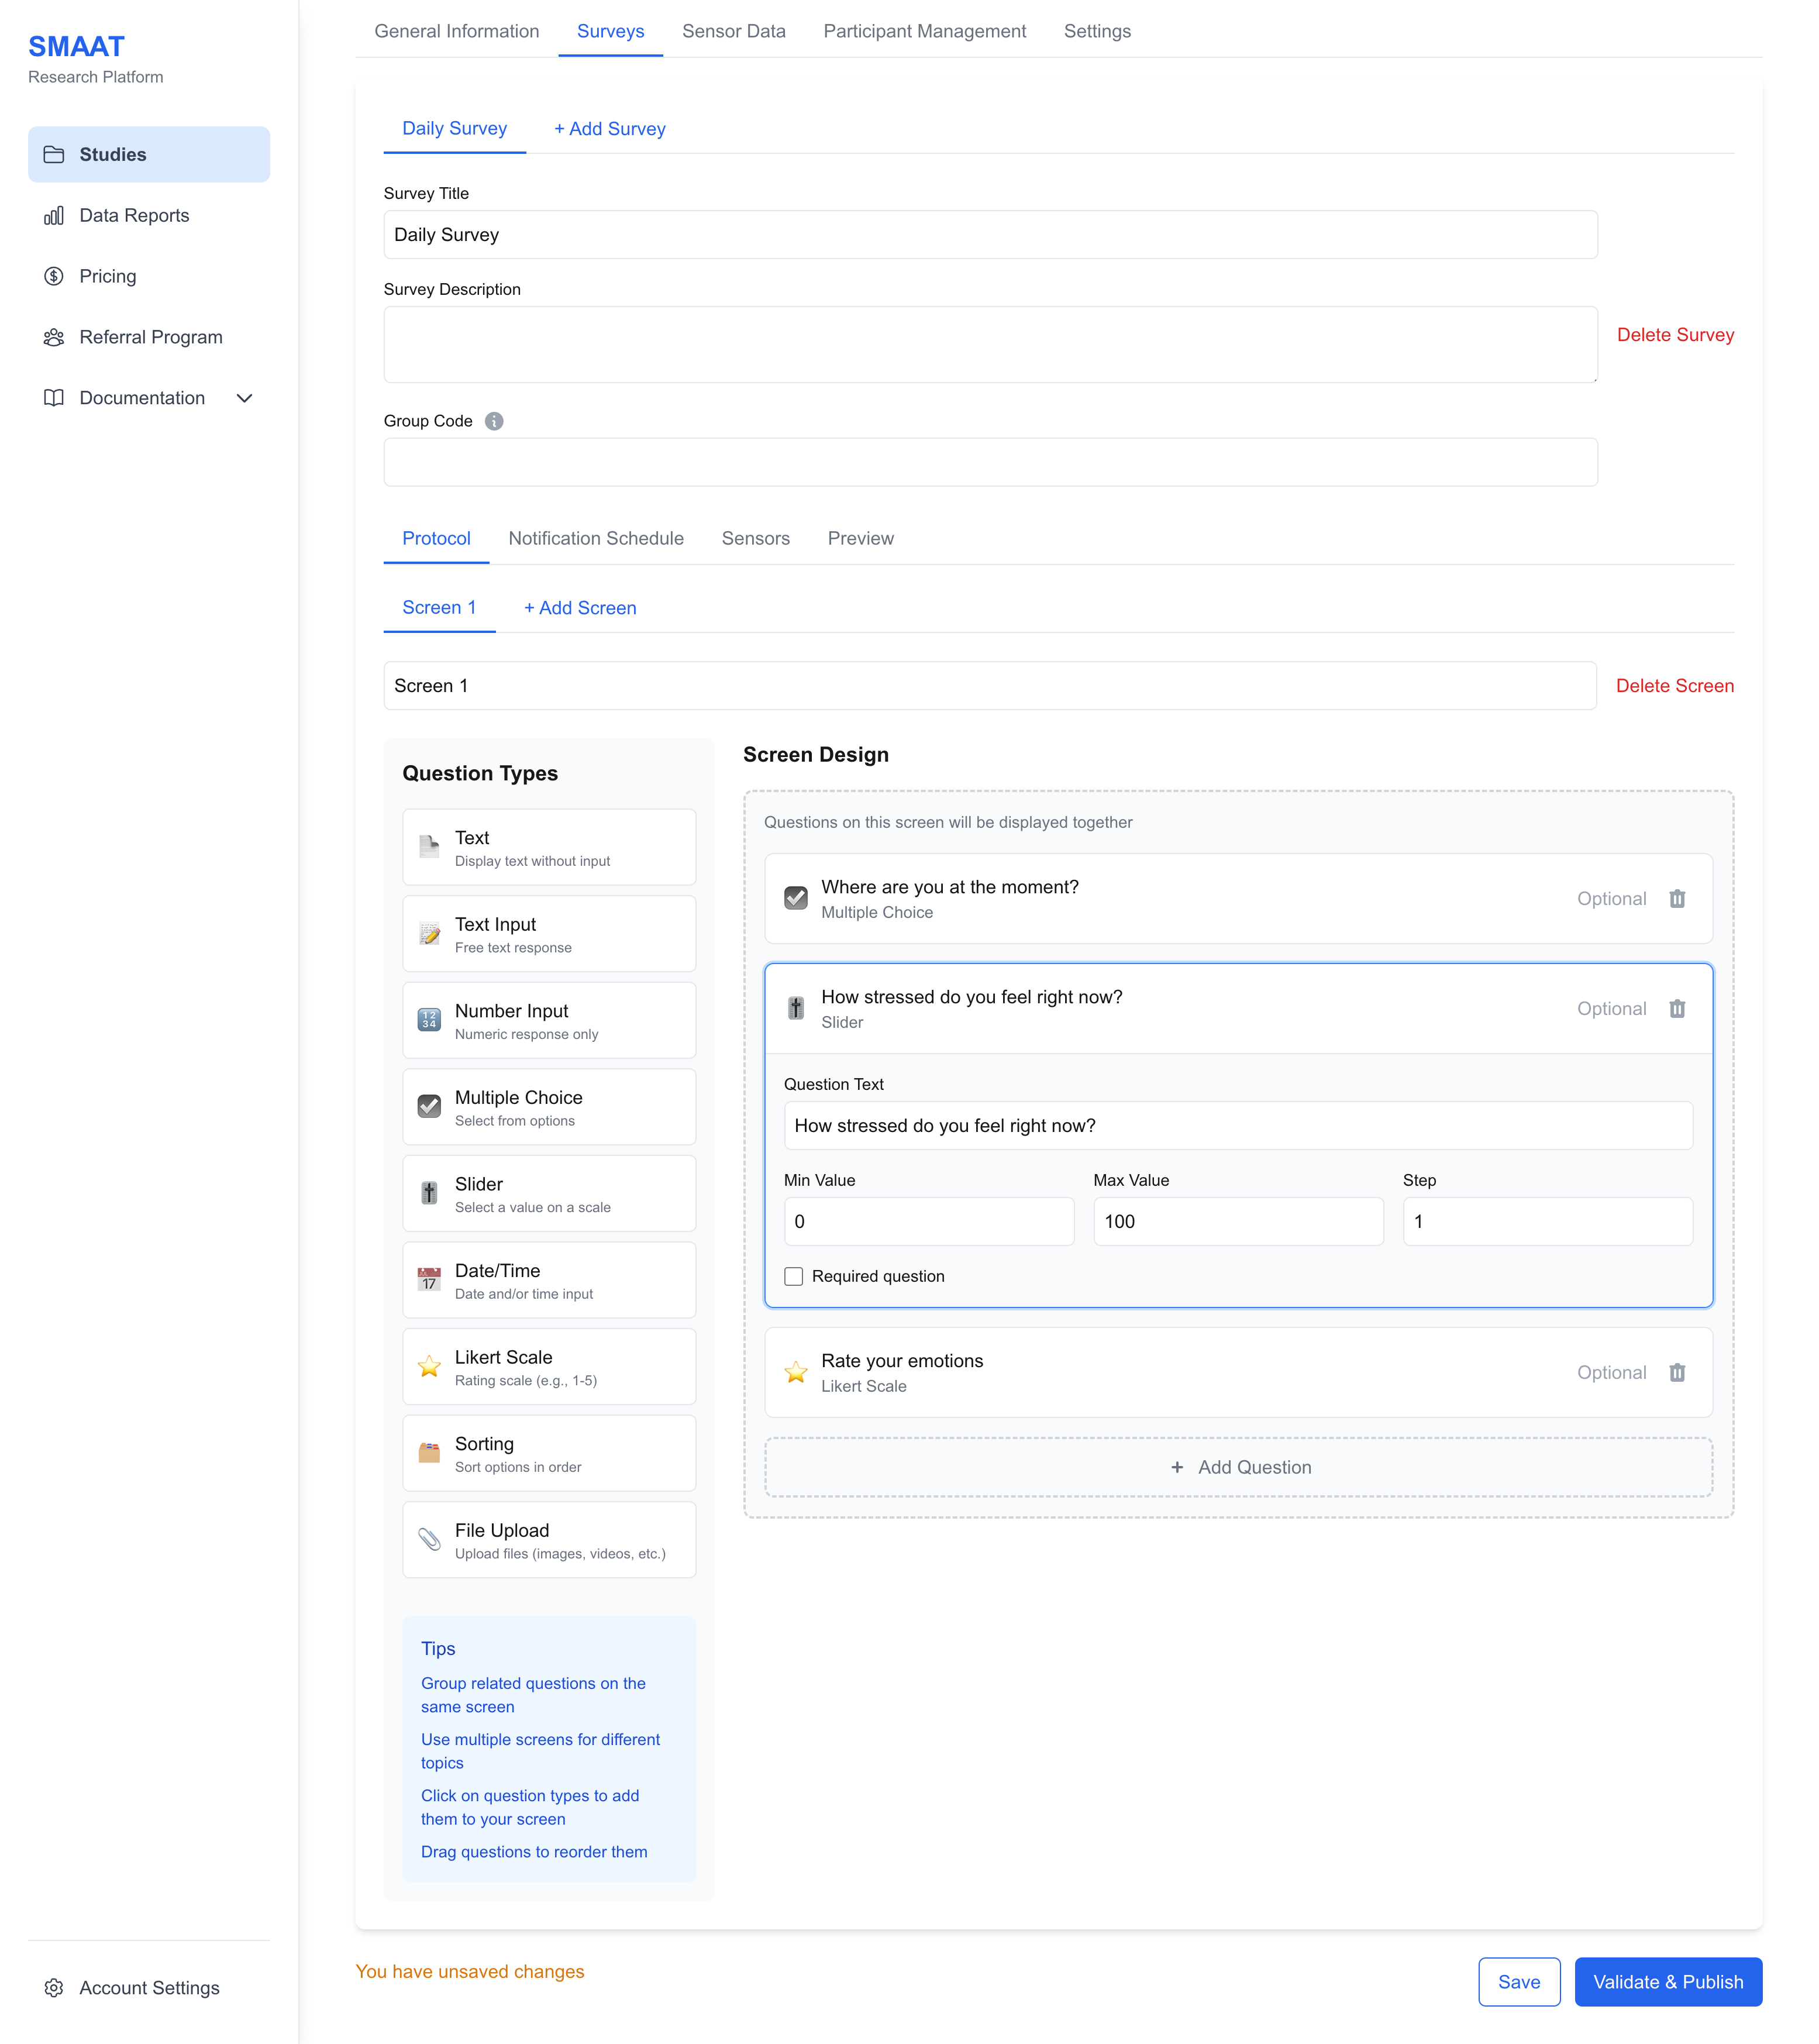
✓ CheckThe Screen Builder lists your three questions.
4. Let yourself start the survey
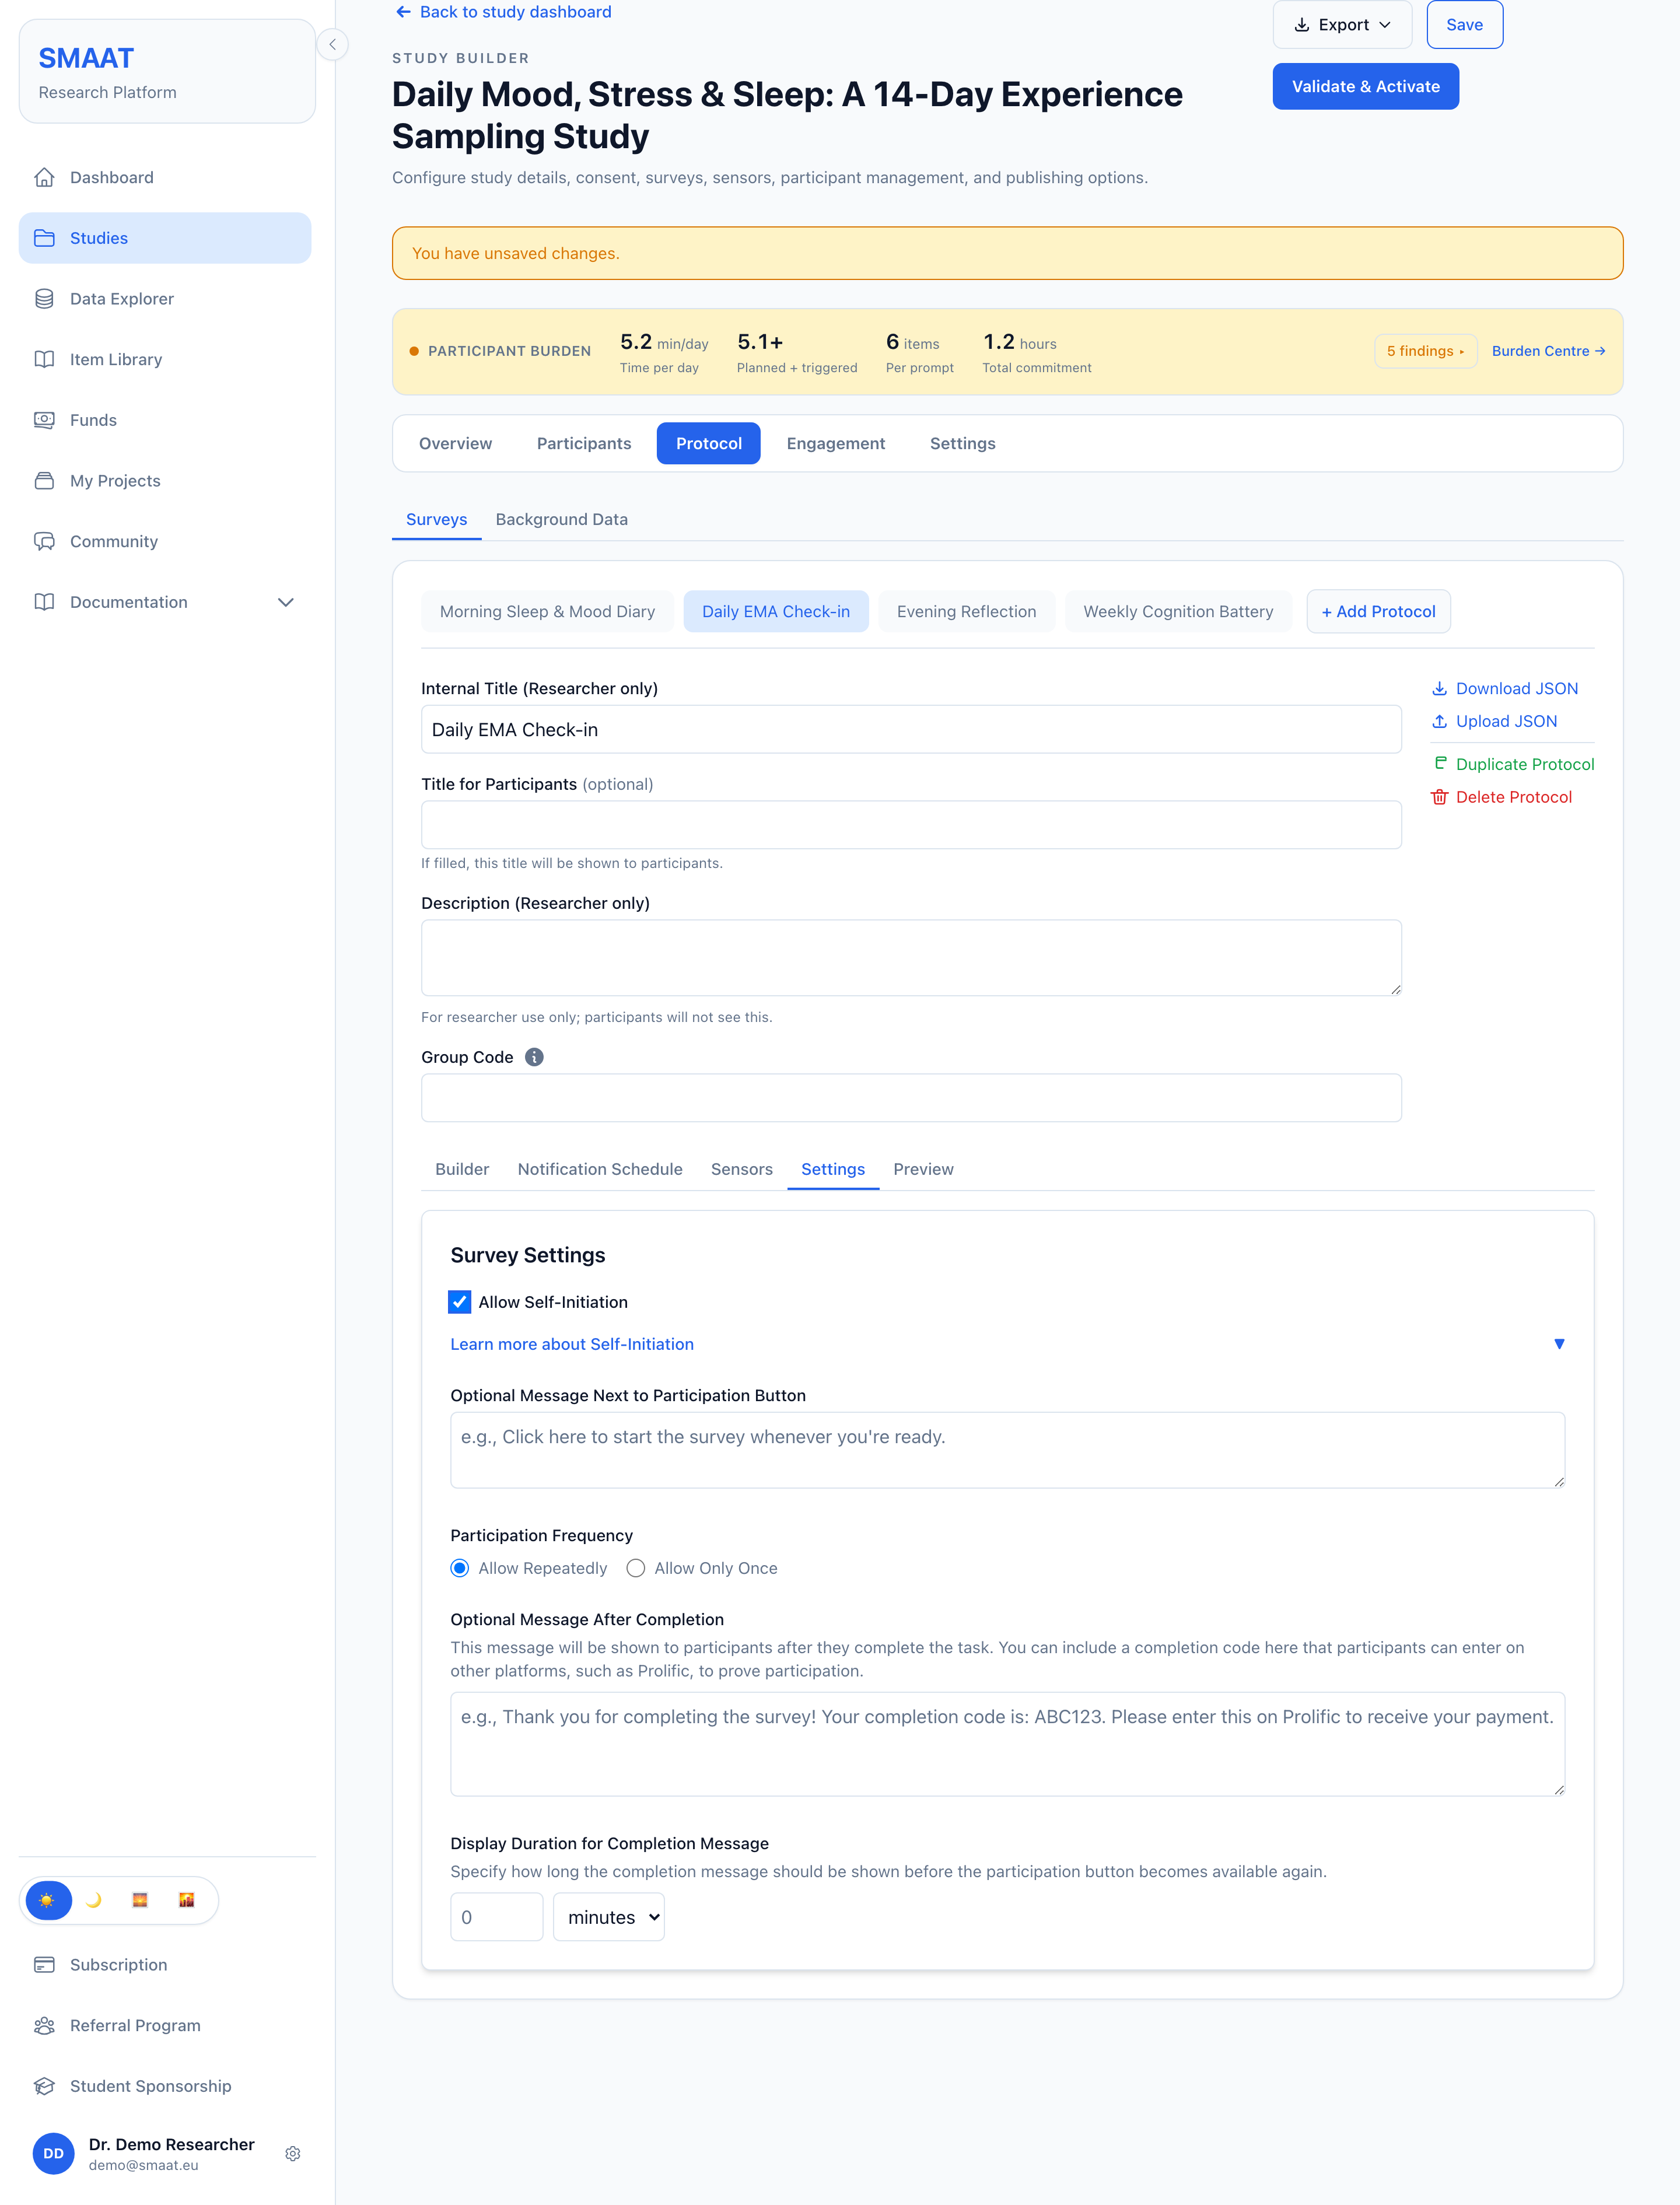
- Open the survey's Settings tab and tick Allow Self-Initiation. Leave Allow Repeatedly selected.
A draft study sends no notifications. With self-initiation, the app shows a Start survey button for this survey, so you can take it straight away. If participants in your real study should answer only when prompted, clear the box again before you activate the study.
5. Add a notification schedule
- Open the Notification Schedule tab. Under "No schedules configured", click Random Sampling. The default sends three notifications at random times between 09:00 and 21:00.
- Enter a Notification Title, for example "Time for a quick check-in". A study cannot be activated while a notification title is empty.
- Click Save.
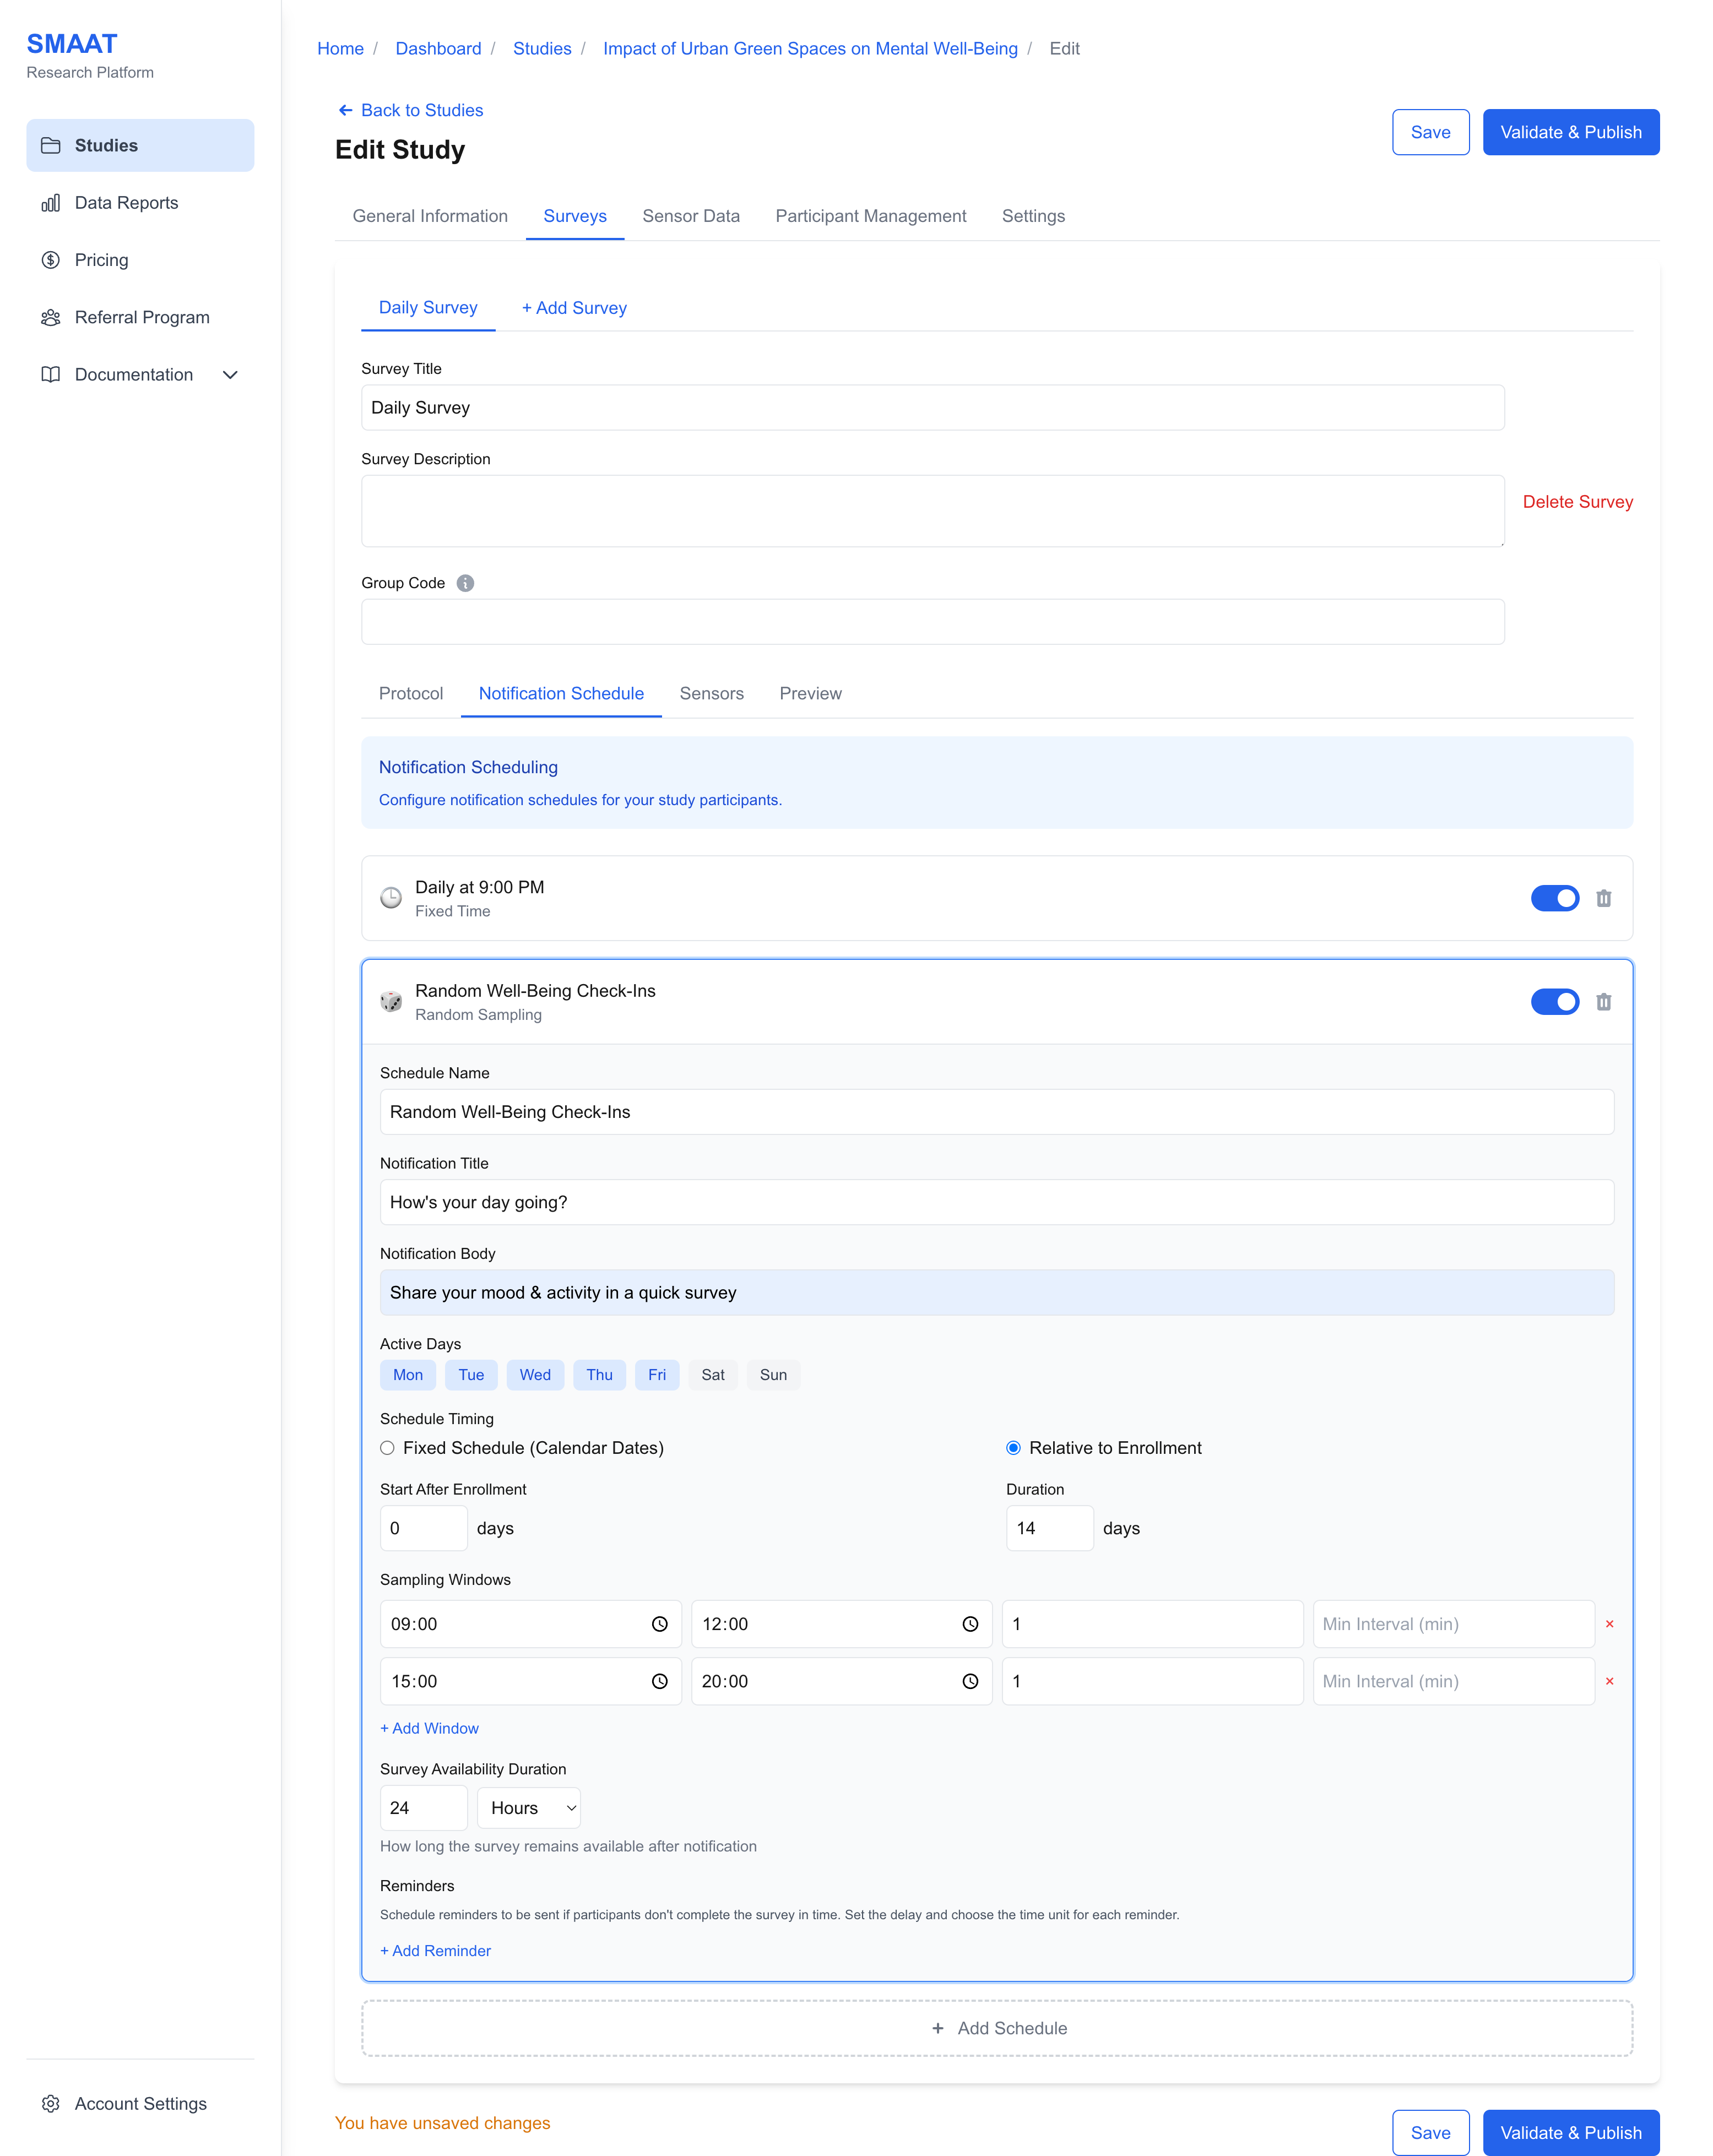
The schedule sends nothing while the study is a draft. The other schedule types, such as fixed times and location triggers, are described in Designing Surveys.
✓ CheckThe schedule card shows Random Sampling with its switch on.
6. Preview the survey
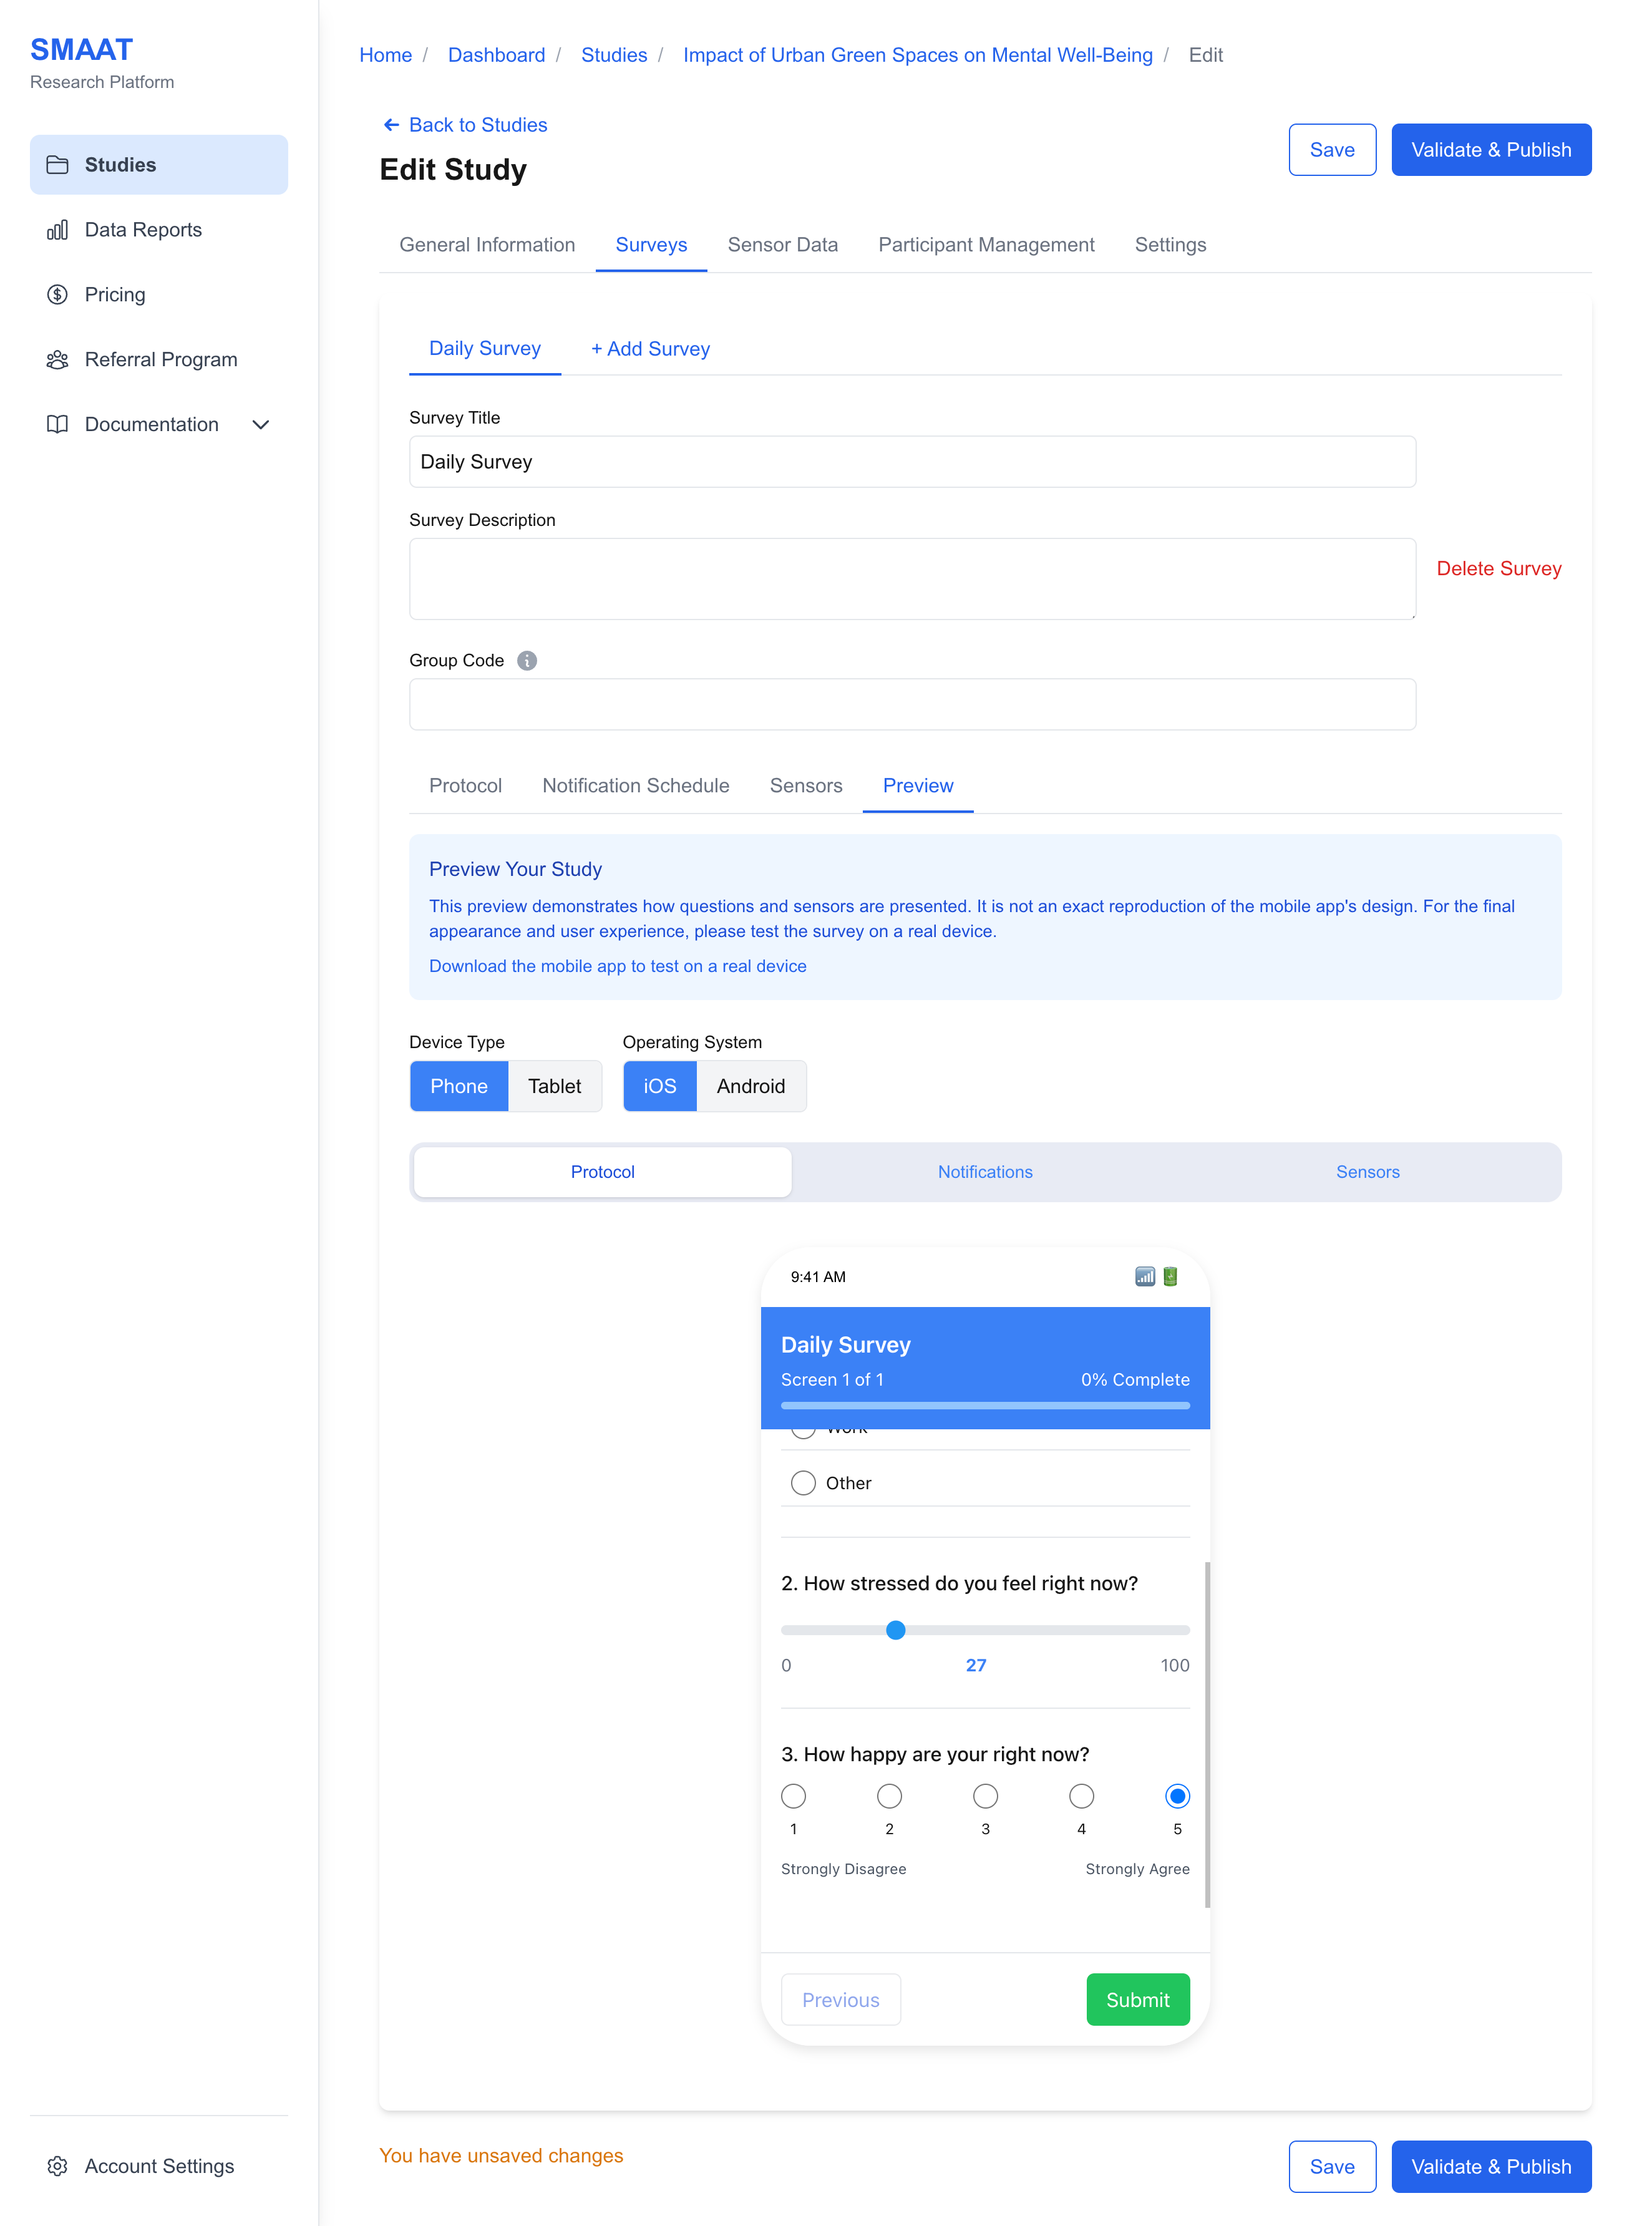
- Open the Preview tab. Switch the Operating System between iOS and Android and answer the questions in the phone frame.
7. Join the study on your phone
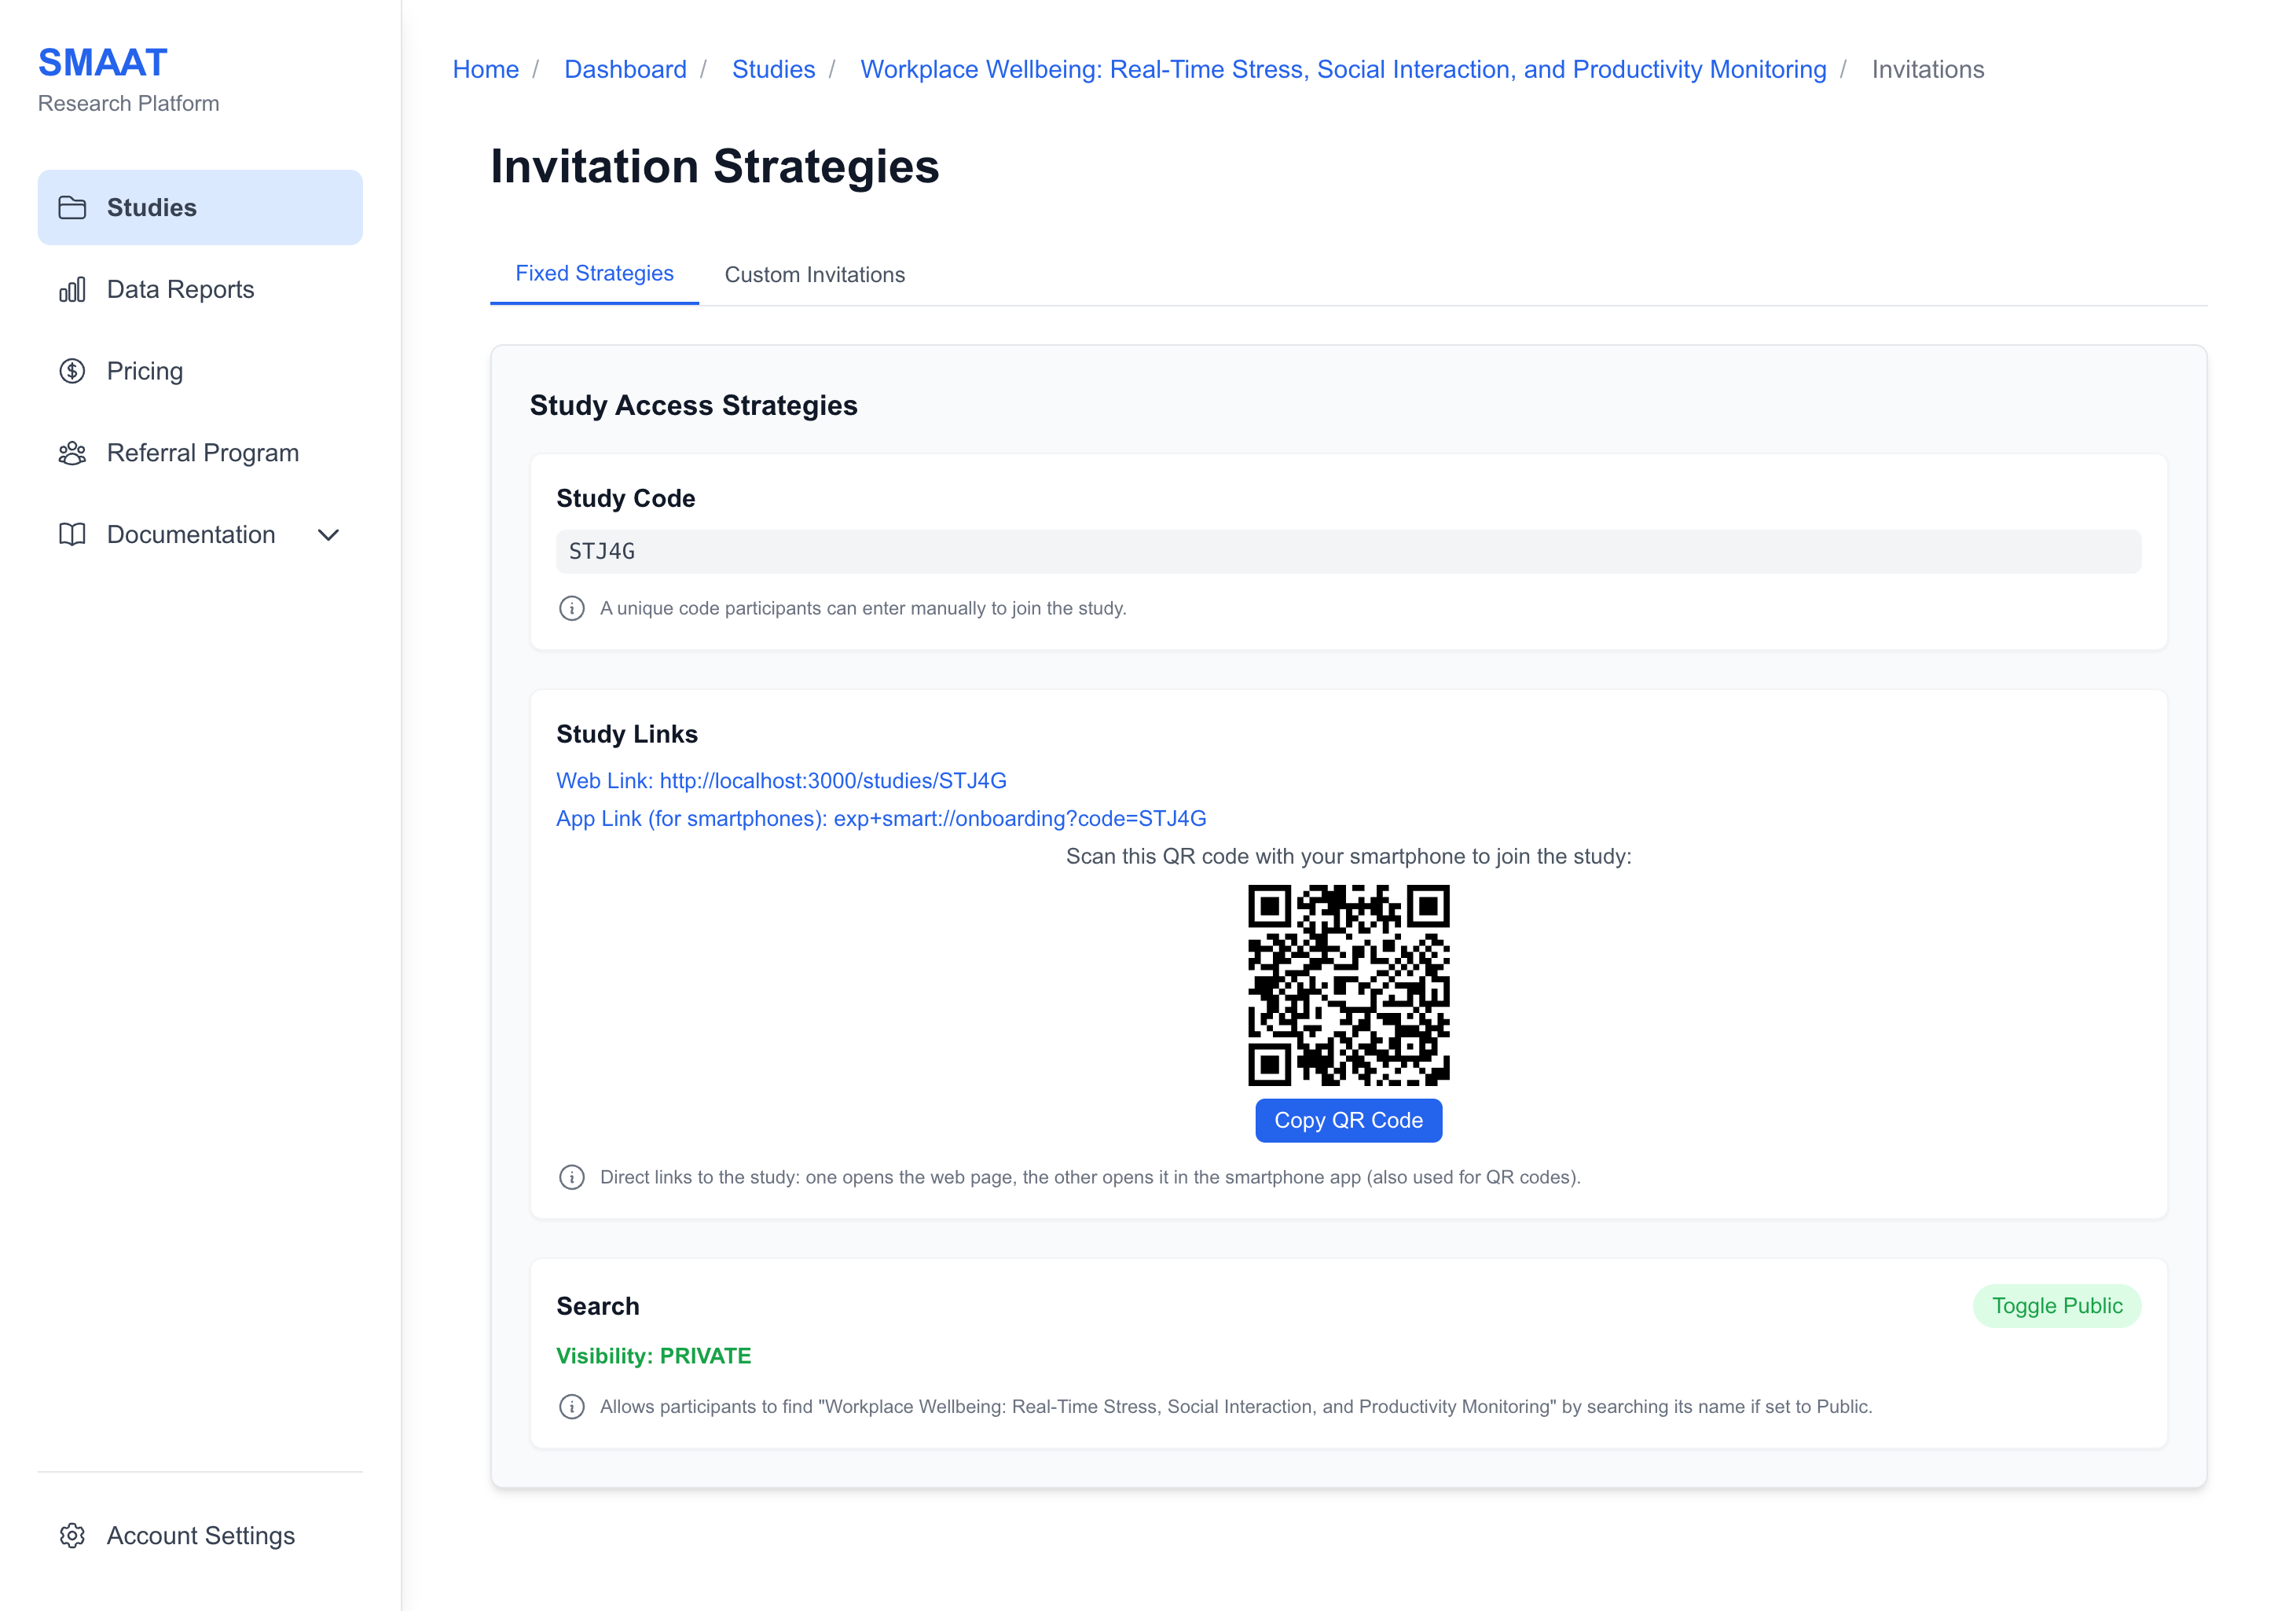
- Click Back to study dashboard and open the Invitations tab. The page reports that the study is in testing mode and lists the Study Code.
- Install SMAAT from the App Store or Google Play and create a participant account with a username, a password and your date of birth.
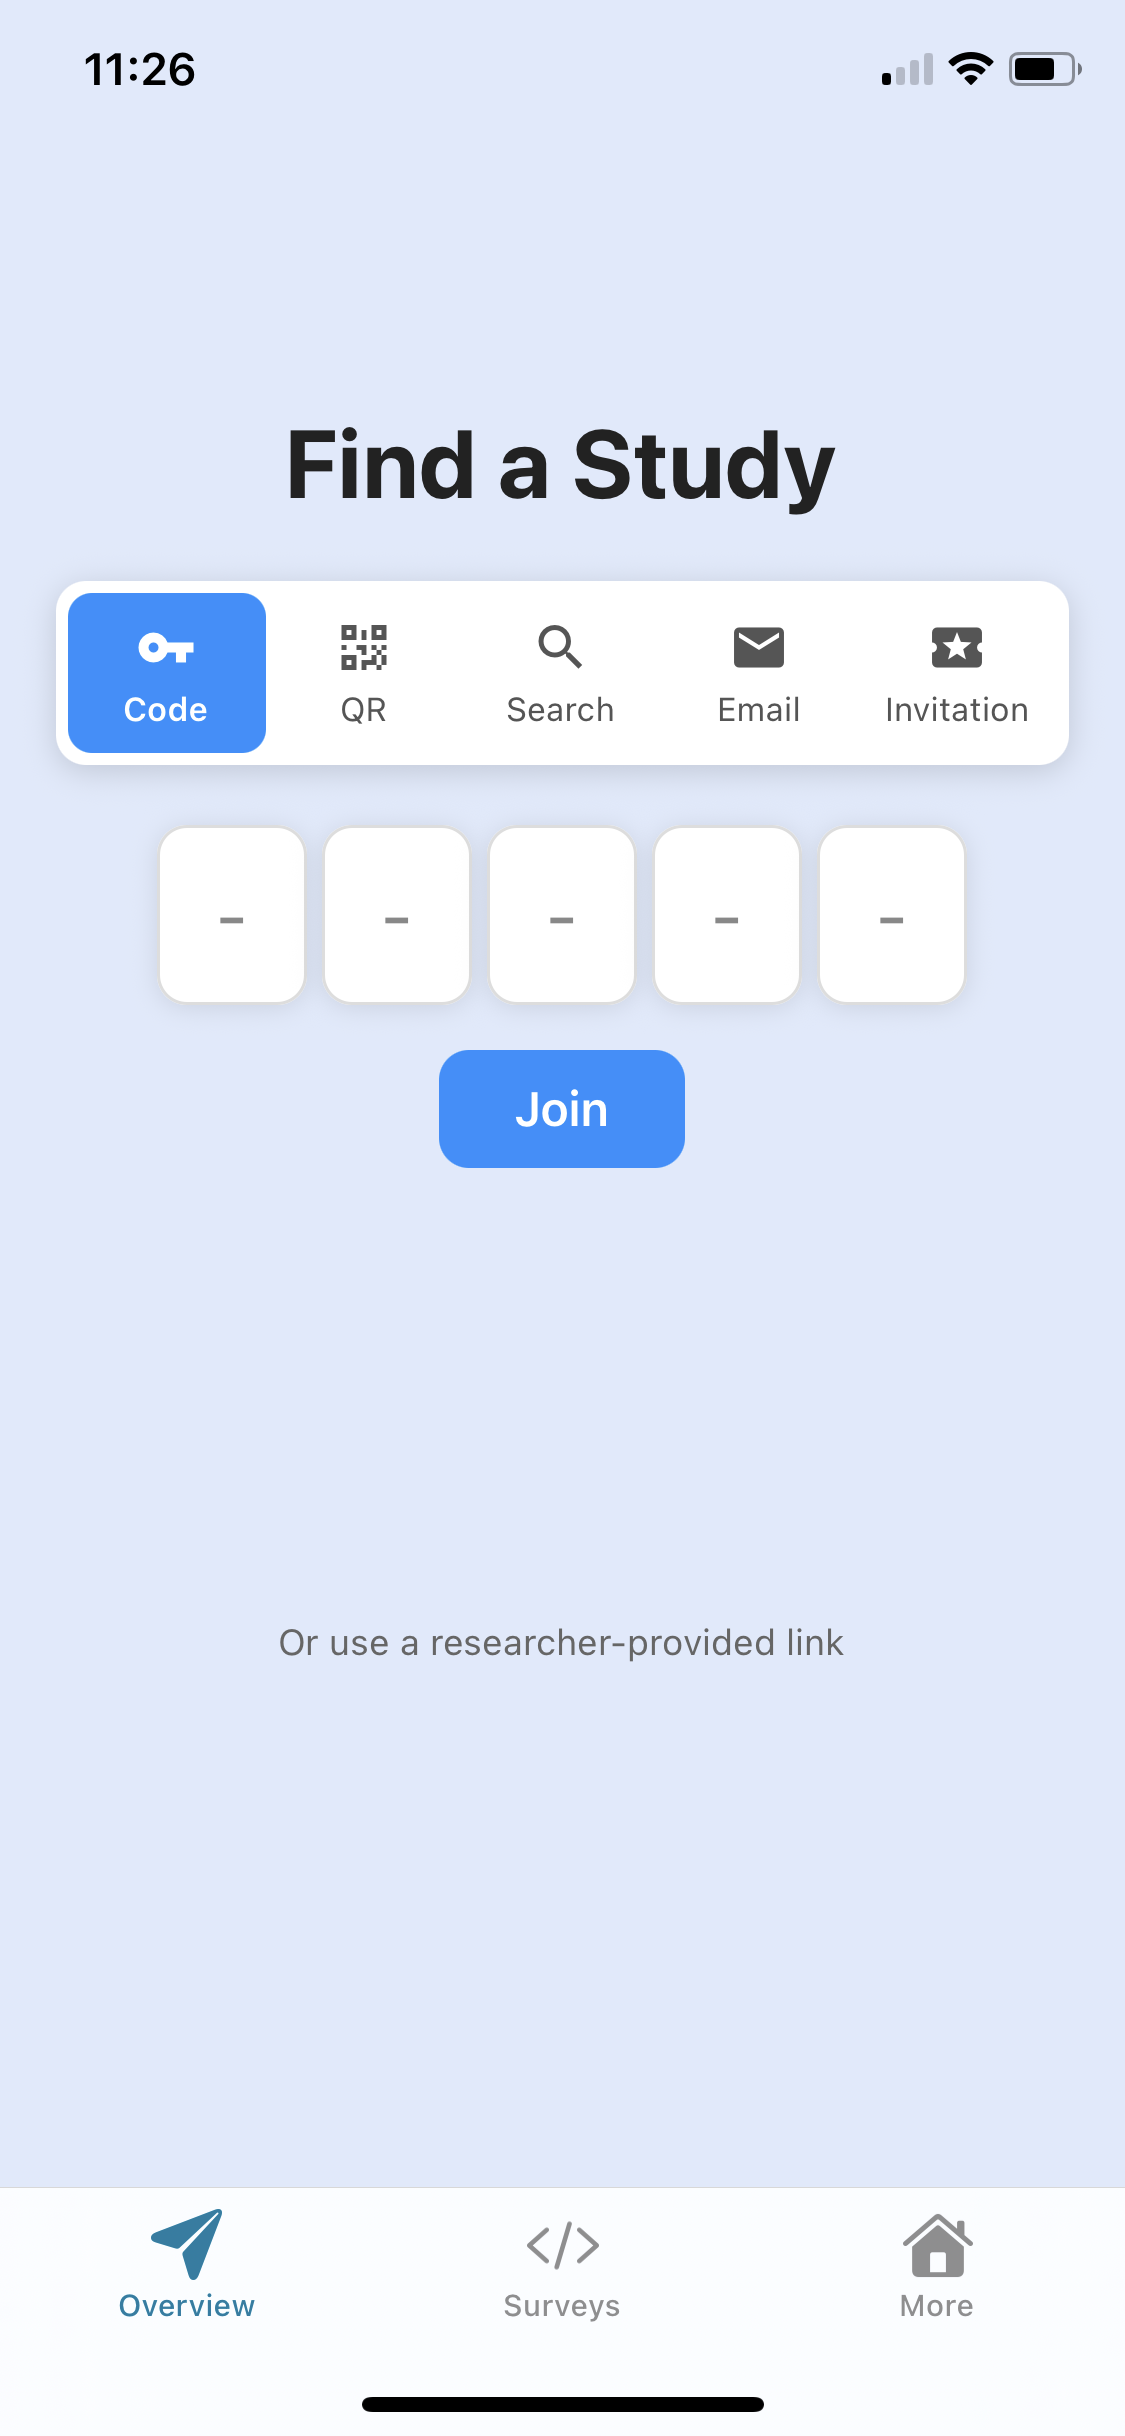
- On Find a Study, choose Code, enter the study code and tap Join. The welcome screen shows the notice "Draft — Testing Mode". Go through the remaining onboarding screens.
- On the study's Overview tab, tap Start survey and answer the three questions.
Your phone uses one of the five participant places of the Free plan. Moving the test participant to Removed participants frees the place again (see Participant limits).
✓ CheckYou have answered the three questions on your phone.
8. Find your response
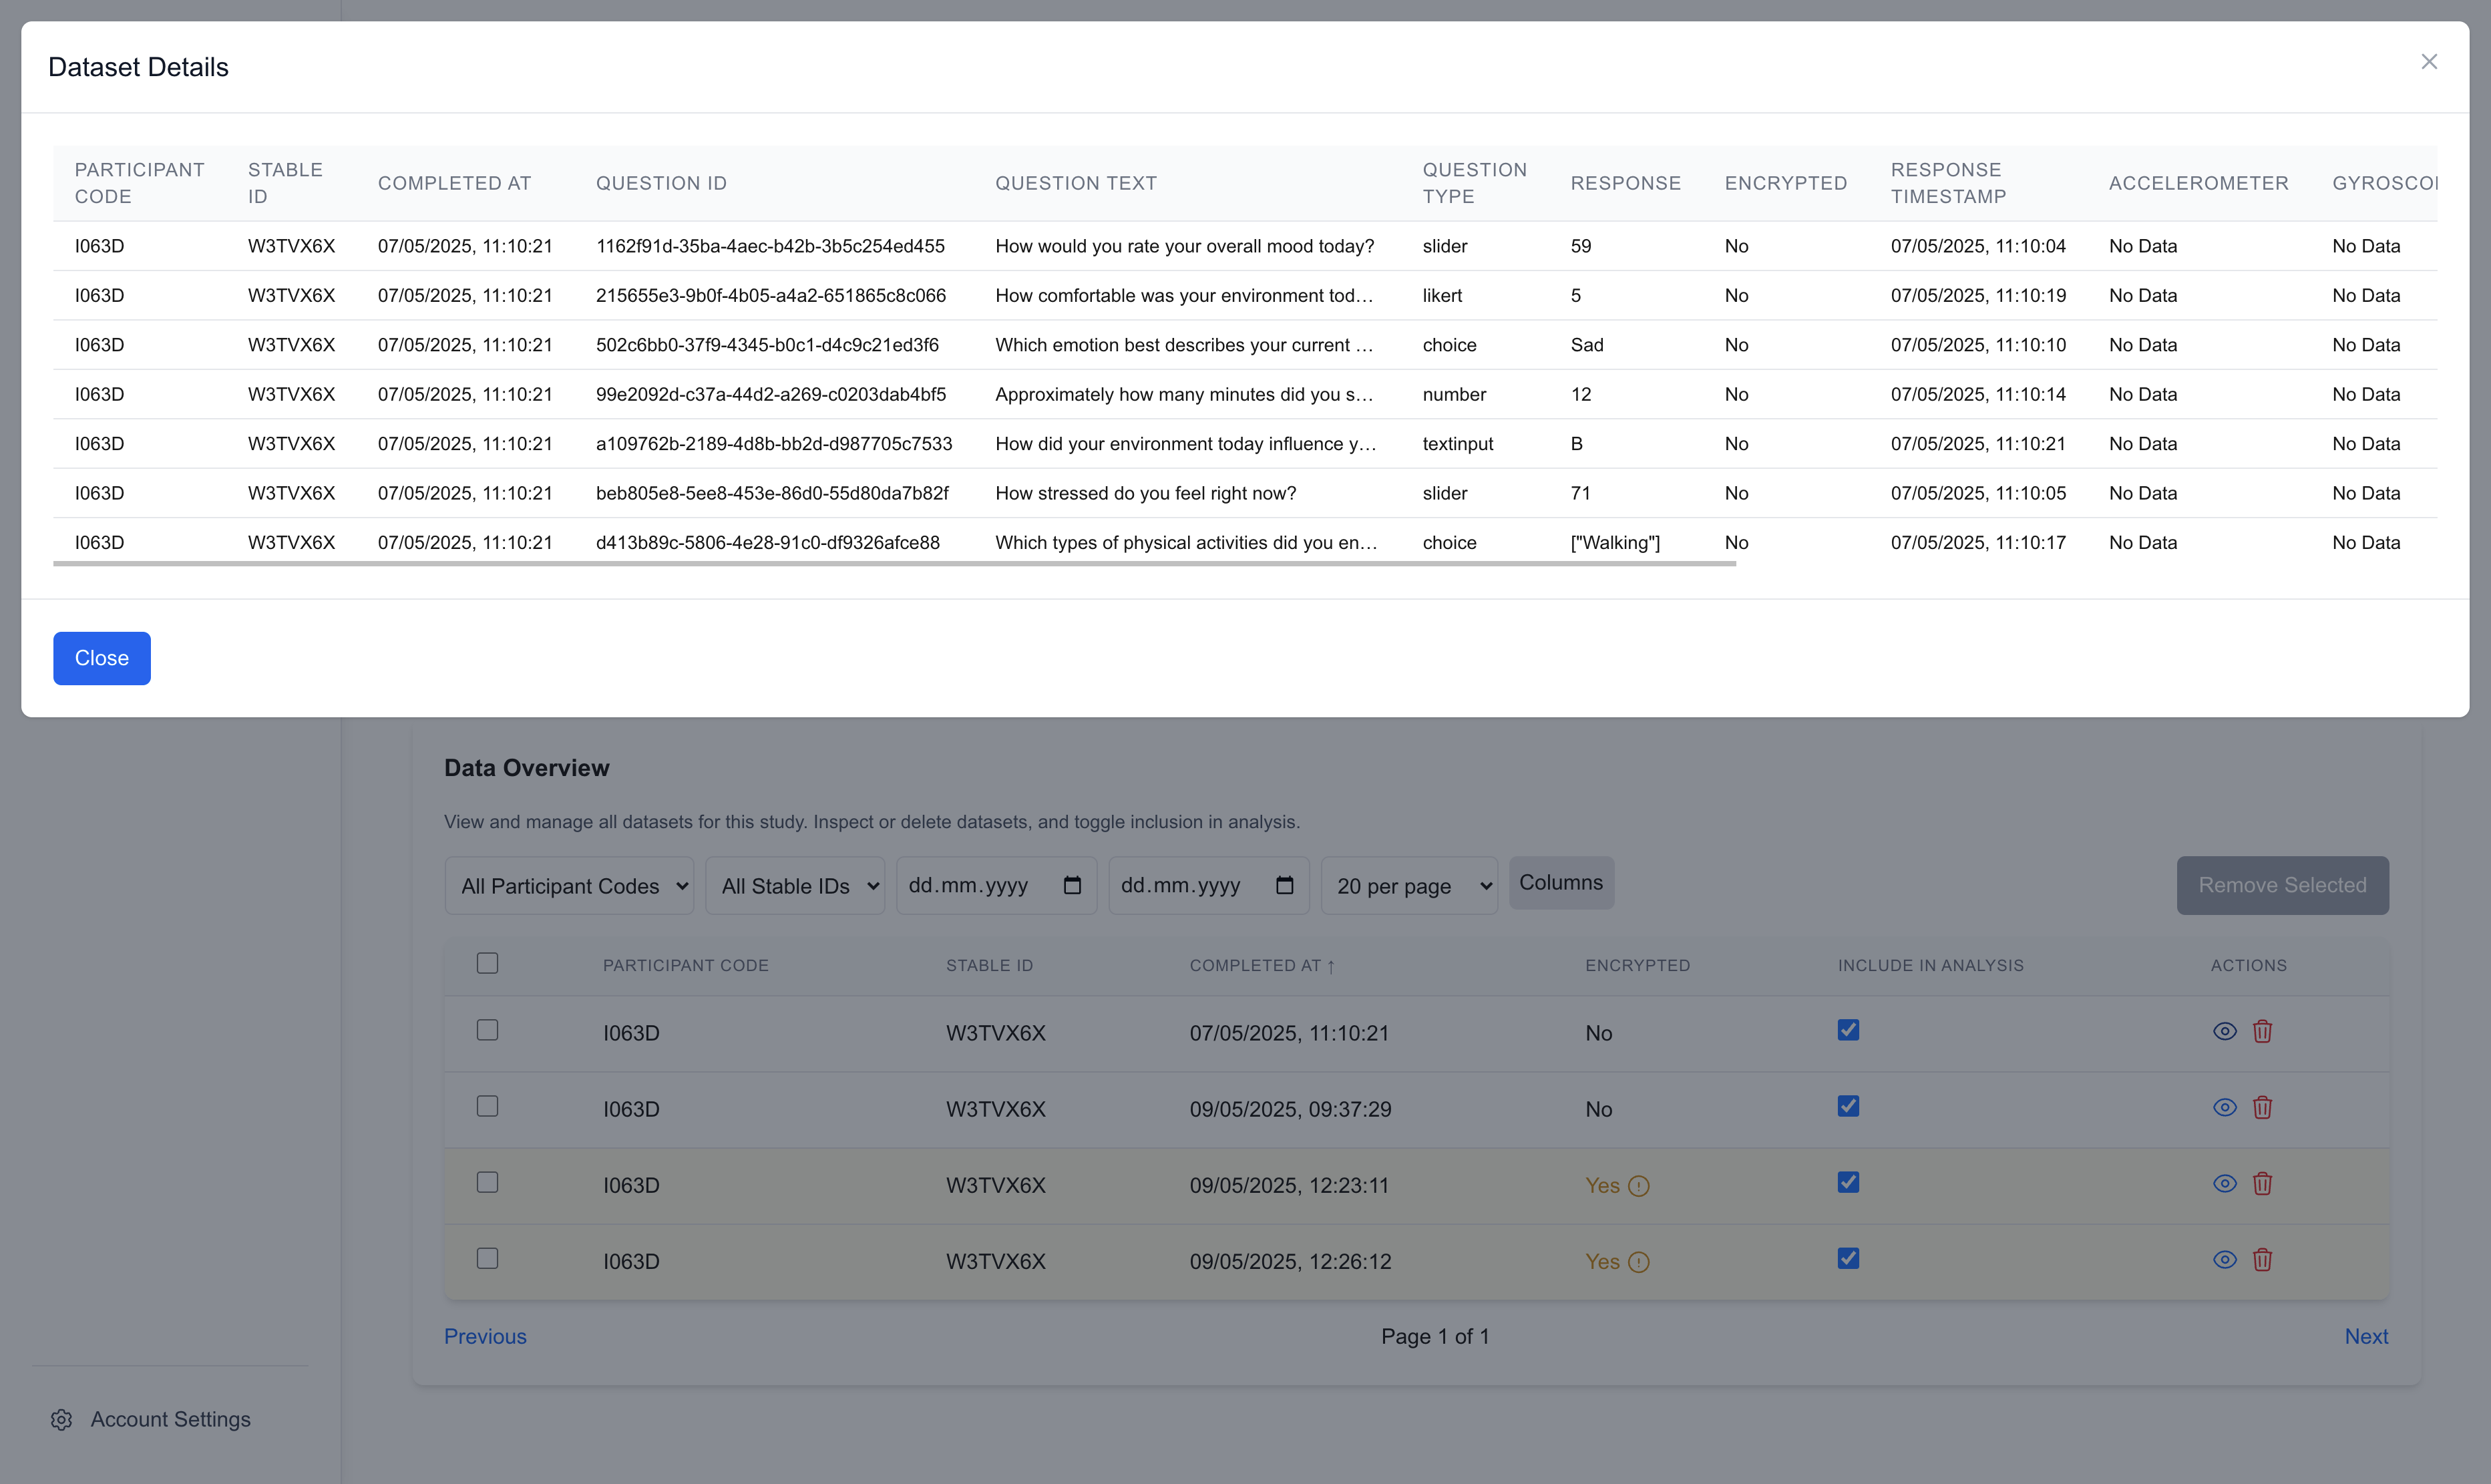
- On the study dashboard, open the Data tab. The Data Overview table lists one dataset with your participant code, the completion time and the Prompt Type Self-Initiated.
- Click the eye icon (Inspect Dataset) to see your answers.
✓ CheckThe dataset shows the answers you gave on your phone.
Before you invite participants
The steps below involve decisions about your design, so they are not part of the 15 minutes.
- Choose how the data is encrypted in the Study Builder under Settings → Security. The option applies to data collected after activation. See Encryption.
- Write the informed consent, including your ethics approval number and institution. See Informed consent.
- Click Validate & Activate. The summary reports how many notifications were created. See Validating and activating a study.
- Take part yourself for a day and answer the scheduled prompts as they arrive.
- Set your test responses aside by clearing Include in Analysis in Data Overview, then share the study code or link with participants.